
Grilled cheese sandwiches are the epitome of comfort cuisine. With a crispy exterior and a melty, gooey interior, they are straightforward, quick to prepare, and endlessly satisfying. However, not every grilled cheese is created equal. While some can be lackluster, this recipe offers a delightful twist: it’s beautifully golden, buttery, and bursting with flavor.
You’ll take one bite and think, “This is unreal!” In this guide, we will walk you through a step-by-step process to achieve grilled cheese perfection, covering the best types of bread, the ultimate cheese combinations, and the secrets to achieving that legendary cheese pull. Ready for a sandwich you can’t resist? Let’s dive into making a grilled cheese you’ll keep coming back to.
Reasons to Adore This Grilled Cheese Sandwich
This isn’t just a typical grilled cheese sandwich. It’s one that will make you momentarily stop and exclaim, “Wow.” Whether you’re a novice cook or a seasoned grilled cheese aficionado, this recipe strikes the perfect balance of simplicity, comfort, and scrumptiousness. Here’s why this variation will win your heart:
- A Delightfully Golden, Buttery Crunch: The key lies in the butter—do not hold back. Utilizing real, softened butter on each slice creates the dreamy crunch that every grilled cheese should have.
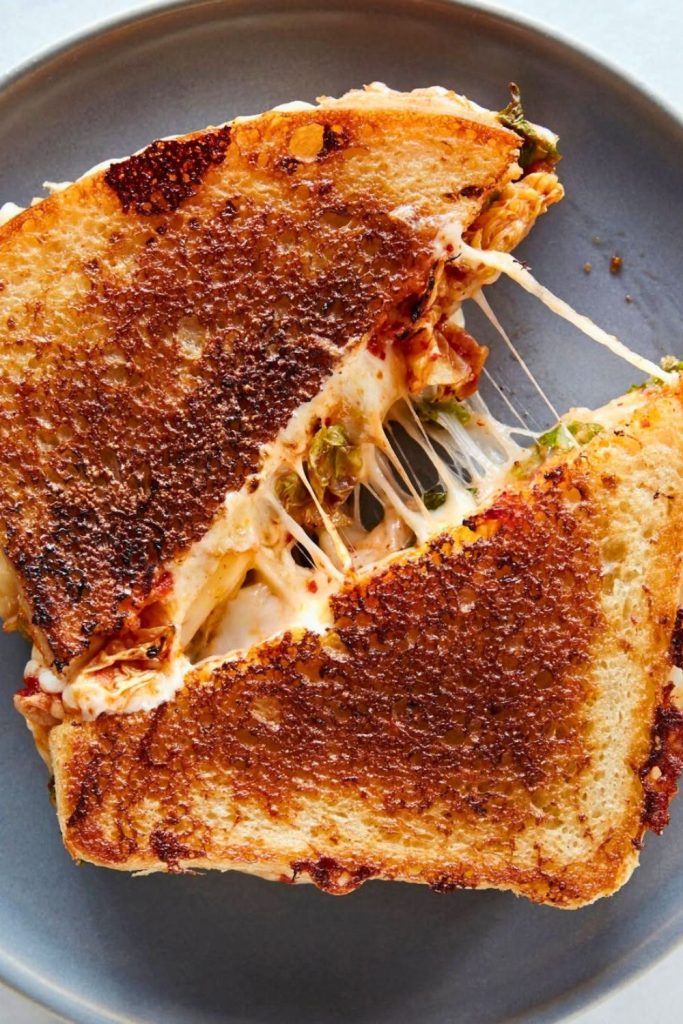
- The Alluring Cheese Pull: That magical stretch that connects your plate to your mouth like a cheesy delight comes from incorporating three kinds of cheese, each uniquely melty and savory.
- Complex Cheese Flavor: This sandwich isn’t one-dimensional. The combination of sharp cheddar, creamy Havarti, and smooth Gouda offers a multi-flavor experience with every bite. It’s creamy, tangy, and smoky—all at once.
- Perfect for Any Setting: Kids can’t get enough of it, and adults go wild for it. It’s quick enough to whip up for lunch while being cozy enough for dinner, making it a sure hit whether for a casual snack or a gathering. Pair it with a bowl of tomato soup for the ultimate comfort meal.
- Fast and Foolproof: Even if it’s your first time making a grilled cheese sandwich, this recipe will make you feel like a professional. With just a few simple ingredients and about seven minutes on the skillet, you can create something delectable. Once you try this recipe, standard bread and cheddar cheese will feel like a thing of the past. This is grilled cheese, elevated.
What You’ll Need
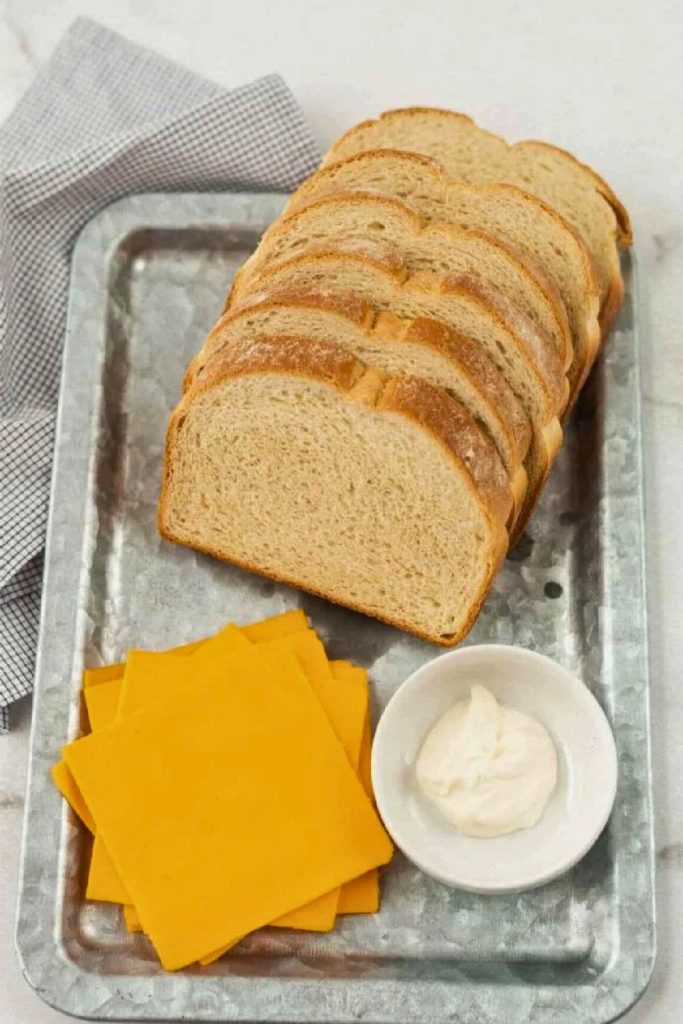
To craft the ultimate grilled cheese sandwich, you won’t need many ingredients, but quality is crucial. Use thick, fresh bread and genuine cheese (no processed variants) to fully savor the expected flavor. Here’s a quick summary of the essentials:
| Ingredient | Amount | Notes |
|---|---|---|
| Texas Toast | 2 slices | Thick-cut bread helps create that crisp crust and holds all the cheese. |
| Softened Butter | 1 tablespoon total (½ tbsp per slice) | Spread on the outside for golden-brown crunch. |
| Medium Cheddar | 1 slice | Sharp and melty. Adds classic flavor. |
| Havarti Cheese | 1 slice | Buttery, creamy, and smooth-melting. |
| Gouda Cheese | 1 slice | Spread on the outside for a golden-brown crunch. |
Optional Additions:
- Thin slices of tomato – For a refreshing zing.
- Crispy bacon – Infuses sweetness and richness.
- Caramelized onions – Adds a sweet depth.
- Avocado slices – For that creamy element.
- Jalapeños – For a spicy kick.
💡 Tip: If Texas Toast is unavailable, thick-cut sourdough or French bread is a suitable substitute. The focal point lies in using sturdy slices that can toast effectively without becoming soggy. This combination of ingredients crafts the ideal balance of flavors, melt, and crunch that makes this sandwich truly stand out.
Step-by-Step Guide to Creating the Perfect Grilled Cheese Sandwich
Crafting the perfect grilled cheese is not rocket science, but it does require finesse to get it just right. We’re aiming for that buttery golden crust, the gooey central filling, and a cheese pull that could impress anyone. If you’ve ever wished to enhance your grilled cheese from basic to absolutely fantastic, this guide is your ticket. Let’s navigate through each phase, from buttering the bread to that final slice showcasing cheesy perfection.
Step 1: Generously Butter Your Bread
This may seem trivial, but the way you butter your bread can make or break your grilled cheese. This is the foundation for everything that follows. Start with two slices of thick-cut bread, ideally Texas Toast. Why? It’s durable, fluffy, and thick enough to withstand heat without burning or becoming soggy. Here’s the essential rule: Use softened, room-temperature butter. Approximately ½ tablespoon per slice should be spread evenly on one side of each piece. Remember, we’re buttering only one side, and these will face the skillet.
Why not cut corners? The butter forms that golden, crunchy texture and rich flavor quintessential to a great grilled cheese. Skimping here means your sandwich may not crisp effectively and could stick to the pan. Pro tip: Enhance the flavor by blending in some garlic powder or grated parmesan with the butter before spreading.
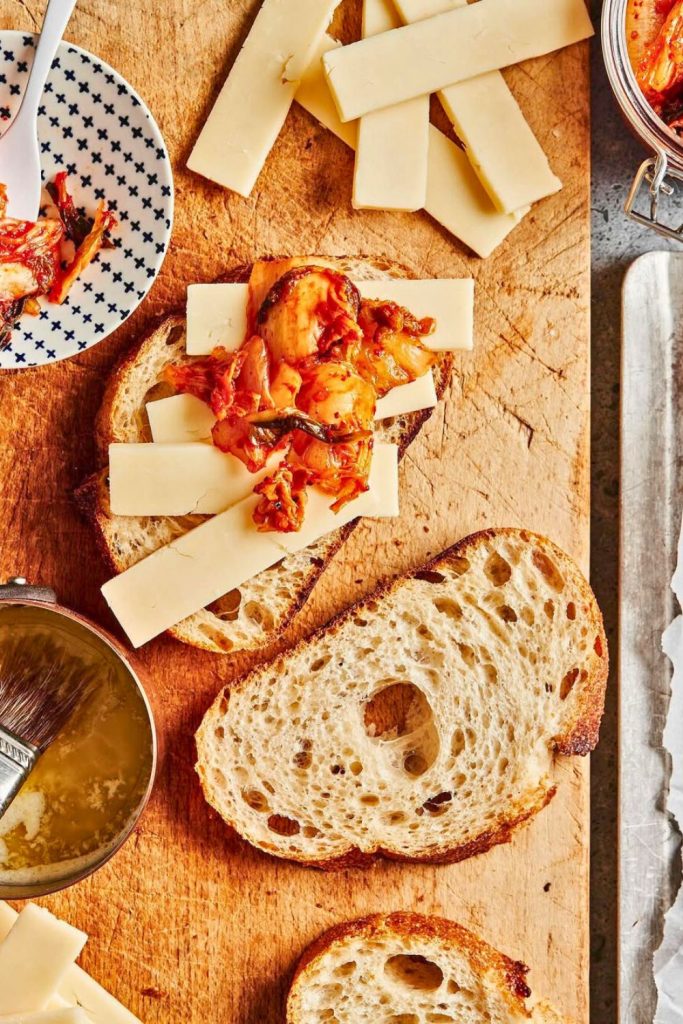
Step 2: Select Your Cheese Carefully
Now, let’s discuss the centerpiece of our sandwich: the cheese. We’re foregoing the single-wrapped slices of processed cheese for superior options. This sandwich merits genuine cheese that melts effortlessly and is packed with flavor. Here’s the triumphant trio used in this recipe:
- 1 slice of medium cheddar: Bold and rich flavor with excellent meltability.
- 1 slice of Havarti: Buttery and incredibly creamy.
- 1 slice of Gouda: Adds a smooth and slightly smoky layer to elevate the dish.
Layer the cheeses directly on top of each other. This creates a blend of flavors and textures that meld into a cheesy masterpiece. If you’re adventurous, you might explore combinations like pepper jack with mozzarella or Swiss and brie.
Bonus Tip: For faster melting, grated cheese works wonders. If you’re pressed for time, consider shredding your cheese instead of using slices. This trio provides the ultimate blend of melty, stretchy, creamy, and flavorful cheese. It’s not merely a sandwich; it’s an experience.
Step 3: Prepare the Skillet (Cast Iron is Best)
Ready to start cooking? Place your skillet on the burner and set the heat to medium-low. Yes, let’s avoid high heat or even medium. A slow, steady sizzle is what you’re after. If you can, opt for a cast-iron skillet; it distributes heat evenly and retains temperature expertly, resulting in an impeccable golden crust. However, if you don’t have one, any non-stick or stainless-steel skillet will work well.
Why medium-low? High temperatures will scorch your bread before your cheese has a chance to melt. Cooking at low and slow makes sure to achieve that crispy exterior and a gooey, melted center. Do not wait for the pan to preheat. Place the first slice of buttered bread into the cold or slightly warmed skillet. This allows the bread to toast evenly, absorbing the butter gradually without browning too quickly.
Step 4: Add Your Cheese Stack and Assemble the Sandwich
Now that your first slice is resting in the skillet, it’s time to do the fun part: cheese loading. Place your cheese stack (cheddar, Havarti, and Gouda, in any order) directly atop the bread slice in the skillet. Press down gently so they meld together. Then grab your second slice of bread and place it on top, buttered side facing up. Congratulations, you just constructed the most glorious cheese sandwich ever.
Optional Touch: To achieve an extra melty interior, cover the skillet loosely with a lid for the first 2–3 minutes of cooking. This traps heat to facilitate even cheese melting.
Step 5: Cook Slowly to Golden Perfection
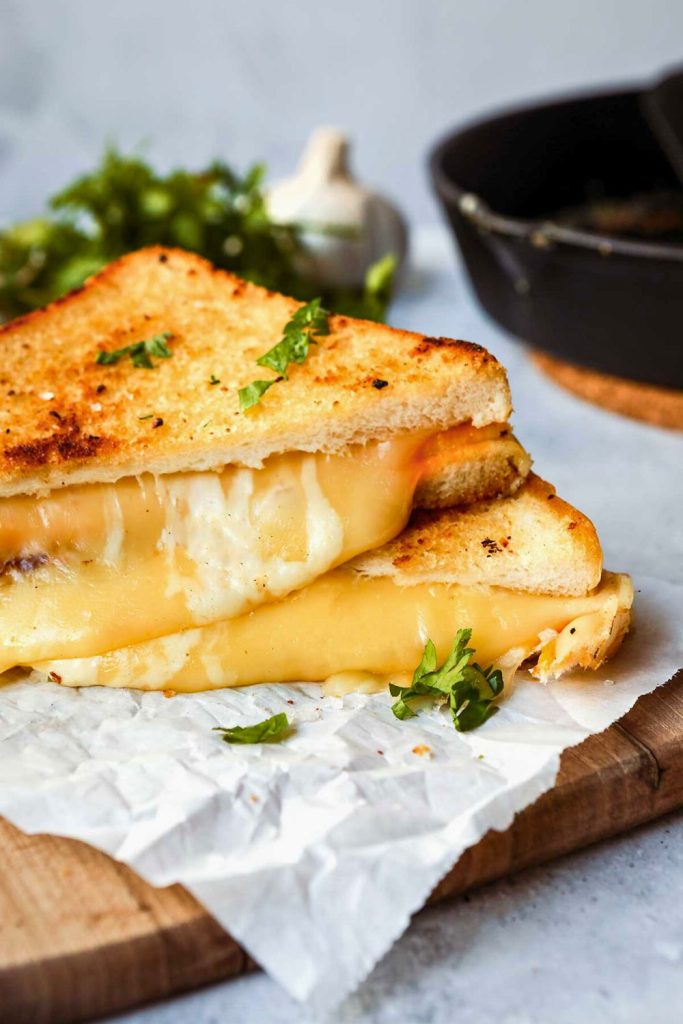
This is where the magic of grilled cheese unfolds slowly, thanks to even cooking over medium-low heat. Resist the temptation to rush. Allow the sandwich to do its thing. Cook it for 3–4 minutes on the first side, checking to see that stunning golden color. Once you notice the edges beginning to brown and hear that gentle crackle, it’s flipping time. Flip with care using a large spatula to keep the layers intact. After flipping, gently press the sandwich down with the spatula to merge the cheese with the bread, achieving that gooey, delightful texture. Let the other side cook for an additional 3–4 minutes until it reaches a deep, golden hue.
The aim: You want a crispy, buttery crust encasing a thoroughly melted cheese center. Each bite should offer a satisfying crunch followed by a melty experience. Feel free to flip again if needed, but try not to overdo it. The cheese should be gooey and just beginning to escape from the sides.
Step 6: Assess That Cheese Pull
Here comes the moment of truth. Move the sandwich to a cutting board and let it rest for 30 to 60 seconds. This helps the cheese firm up a bit, preventing it from oozing out the moment you slice into it. Cut it in half diagonally, of course—everyone knows grilled cheese tastes best when cut this way. As you gradually pull the halves apart, you should witness:
✨ The. Cheese. Pull. ✨ It stretches beautifully, gleaming as it does so. It may look almost too good to devour (but don’t have any worries; you’ll enjoy every bite).
Still see cheese stretching? That’s your sign of success. This grilled cheese doesn’t droop or squish out when bitten into. It’s crispy on the outside, gooey on the inside, with enough structure to hold all that cheesy wonder together.
Expert Tips for Elevating Your Grilled Cheese
Even if you’re an old hand at making grilled cheese, these additional tips will elevate your sandwich from great to memorable:
- Opt for real butter. Margarine or spray options won’t achieve the same result.
- Room-temperature cheese melts faster. Take it out of the fridge about 10–15 minutes before cooking.
- Place add-ins between the cheese layers. Avoid placing tomatoes or bacon against the bread, or you risk sogginess.
- Clean your skillet between sandwiches. If you are making more than one, wipe away any burnt remnants to avoid flavor overlap.
- Serve with tomato soup. There’s a reason this pair has stood the test of time. It’s cozy, creamy, and perfect for dipping.
Pair It With: Creamy Homemade Tomato Soup

Now, let’s discuss the perfect companion for grilled cheese: tomato soup. Some combinations are just meant to be: peanut butter with jelly, mac and cheese, and of course… grilled cheese alongside tomato soup. It’s the ultimate duo, enhancing each other’s flavors. So, if you’re putting in the effort to create the best grilled cheese sandwich, be sure to pair it with homemade creamy tomato soup.
Why This Combination Works
- The acidity from the tomatoes cuts through the richness of the cheese.
- The soup’s silky consistency complements the sandwich’s crunch perfectly.
- Each spoonful becomes a dip-and-enjoy experience.
There’s something wonderfully nostalgic about dunking a grilled cheese in tomato soup. It brings back memories of childhood, rainy days, and cozy nights, all wrapped up in a warm, cheesy spoonful.
What Constitutes a Great Tomato Soup
- Utilize whole canned tomatoes for richer flavor.
- Sauté garlic and onions in olive oil or butter to build a flavorful base.
- Add a splash of cream or whole milk for a luxurious finish.
- Blend it to a smooth consistency or leave it a bit chunky, depending on your taste.
- Season generously with salt, pepper, basil, and a hint of sugar to balance out the acidity.
Bonus tip: Incorporate a swirl of pesto or sprinkle of Parmesan right before serving. Trust us, it’s worth it.
Dunk. Bite. Repeat. Once your soup is deliciously heated, pour it into a bowl, slice your grilled cheese, and enjoy. The cheesy middle absorbs the tomato flavor while the crispy edges remain perfectly golden and crunchy. This isn’t just a meal—it’s a celebration. This combination highlights the best aspects of both items. The soup tastes richer, the sandwich feels bolder, and together, they create an addictive harmony.
“Dunk. Oh my goodness. Yum, yum, and yum.” That’s the only fitting description.
5 Tips for Ultimate Grilled Cheese Perfection Every Time
Despite grilled cheese being inherently simple, minor adjustments can be transformative, ensuring that your sandwich delivers that coveted golden crunch, delectable cheese pull, and mouth-watering flavor every single time.
- Don’t Skimp on the Butter: The butter is essential. It’s responsible for creating that stunning golden crust and that sought-after crunch. Use real, unsalted butter, softened to make it easy to spread. Apply about ½ tablespoon on each side of the bread, ensuring you coat every edge thoroughly. Pro tip: For a flavor boost, blend your butter with garlic powder, grated Parmesan, or a pinch of Italian herbs for added deliciousness.
- Choose the Right Bread: The bread is your grilled cheese canvas. If it’s too thin, it will burn before your cheese has a moment to melt. If it’s too soft, you risk a soggy sandwich. Aim for thick-cut slices like:
- Texas Toast
- Sourdough
- Rustic country white
- Brioche (to add a touch of sweetness)
- Choosing sturdier bread enhances texture and simplifies achieving that ideal outer crust without sacrificing the melty interior.
- Cook Low and Slow: This is not a race. High heat may toast your bread faster, but it leaves the inside cold and unmelted. Maintain medium-low heat for best results, cooking for about 3 to 4 minutes per side. This allows the cheese to melt slowly while the bread develops a beautifully golden, crispy exterior. Warning: Cranking up the heat is a common rookie mistake, leading to burnt outsides and unmelted insides.
- Utilize a Mixture of Cheeses: Want depth and certainty in flavor? The trick is using a blend of cheeses. One type might come off as flat, but combining two or three varieties grants a rich tasting experience and that classic cheese pull. Here’s why the recipe’s mix (cheddar + Havarti + Gouda) is unbeatable:
- Cheddar adds sharpness and substance.
- Havarti ensures creaminess.
- Gouda contributes a hint of smoky richness.
- Feel free to experiment with whatever you have available, but always aim for high-quality, real cheese.
- Allow It to Rest Before Cutting: It’s tempting to dig in right away, but let your grilled cheese rest on a cutting board for 30–60 seconds after removing it from the skillet. This allows the cheese to settle and thicken slightly, reducing the risk of it oozing out immediately when you cut it. It also helps to enhance the crust’s crispiness. Slice diagonally (for the only acceptable method 😉) and revel in the glorious moment of separation… with that cheese pull!
Possible Cheese Alternatives
If you don’t have cheddar, Havarti, or Gouda readily available, no problem! Many types of cheese melt beautifully and impart fantastic flavor. Here’s a quick-reference chart showcasing excellent alternatives you can use:
Original CheeseBest SubstitutesFlavor ProfileMedium CheddarColby, Monterey Jack, Sharp White CheddarSharp, tangy, classic grilled cheese vibeHavartiFontina, Mozzarella, MuensterButtery, smooth, creamy
- GoudaSmoked Mozzarella, Provolone, GruyèreNutty, smoky, slightly sweet
- MozzarellaFontina, Havarti, Monterey JackRich, nutty, excellent for savory melts
- ProvoloneGouda, Mozzarella, SwissTangy, semi-firm with balanced sharpness
- SwissJarlsberg, Emmental, GruyèreNuts, rich, perfect for savory layers
💡 Tip: Steer clear of overly aged or dry cheeses like Parmesan or Pecorino Romano. They don’t melt well and are better suited for grating over the top than for use within a sandwich.
Final Thoughts
When made correctly, a grilled cheese sandwich is nothing short of magical. It doesn’t need to be fancy or overly complicated, just quality ingredients and a bit of patience on the stovetop can lead to pure comfort on a plate. From the irresistible golden crunch to the viscous cheese center and the delectable pull, this sandwich is undeniably delicious, just as promised.
Once you get the hang of it, it becomes your go-to meal, ready to whip out during busy times, cravings for cozy food, or occasions needing minimal effort for a winning dish. Whether enjoyed with a side of creamy tomato soup, enhanced with unique toppings, or kept as a classic, this grilled cheese recipe is destined to be requested time and again by both children and adults alike. So go on, slice, pull, dip, and savor. Your perfect grilled cheese is waiting.